How to Make Corned Beef Hash with Canned Corned Beef
Canned corned beef hash transforms an overlooked pantry staple into a gloriously crispy, golden-brown meal in under 35 minutes. The secret isn’t a special gadget—it’s learning how to let the hash sit undisturbed long enough to form a real crust.
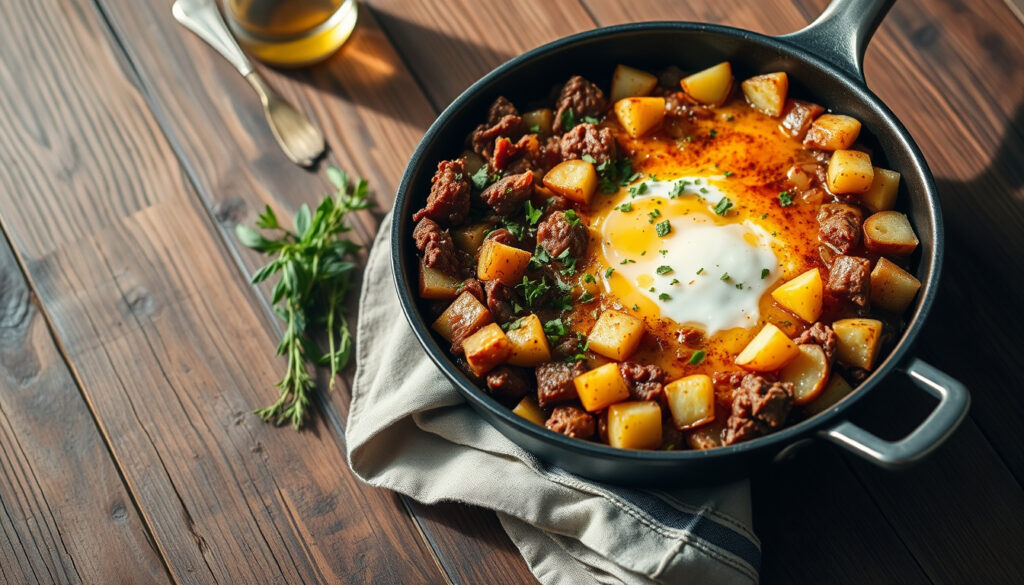
Key Ingredient: Canned corned beef · Common Base: Potatoes and onions · Typical Servings: 4 · Cook Time: 20-30 minutes · Equipment Needed: Skillet
Quick snapshot
- One skillet (The Happier Homemaker)
- 20 minutes total cook time (The Country Cook)
- 12 oz canned beef base (Reluctant Entertainer)
- Less hands-on attention needed (The Takeout)
- Crispy top layer develops slowly (The Takeout)
- Alternative: slow cooker for set-and-forget (Reluctant Entertainer)
- Turns leftover mashed potatoes into a meal (Reluctant Entertainer)
- Creamier, British-inspired texture (Reluctant Entertainer)
- Works with any potato base you have on hand (Reluctant Entertainer)
- Spread thin layer at 400°F for circulation-based crisp (The Takeout)
- No stirring required—just check at halfway point (The Takeout)
- Strong second choice after skillet method (The Takeout)
The ingredients below form the foundation of any solid corned beef hash, with flavor enhancers that elevate the canned base into something worth requesting by name.
| Ingredient | Details |
|---|---|
| Primary Protein | Canned corned beef (12 oz cans) |
| Base Vegetable | Potatoes, peeled and cubed |
| Aromatics | Chopped onions |
| Oil Type | Vegetable oil (2 tbsp) |
| Flavor Enhancer | Worcestershire sauce |
How to make simple corned beef hash?
The one-skillet version is where every home cook should start. You’ll be done in under 35 minutes, and the results beat anything from a can straight to the pan.
Ingredients for basic version
- 1 can (12 oz) corned beef (Reluctant Entertainer)
- 3-4 medium potatoes, diced into 1/2-inch pieces (The Country Cook)
- 1 medium onion, chopped
- 2 tablespoons vegetable oil
- Salt and pepper to taste
- Optional: butter for extra richness between flips
Step-by-step stovetop method
Dice your potatoes first—uniform 1/2-inch pieces cook evenly and brown consistently (The Country Cook). If time allows, parboil them for 5-10 minutes until fork-tender but still firm enough to hold their shape.
Heat oil in your skillet over medium-high. A cast iron pan gives you the best heat retention for that deep sear you’re after (The Happier Homemaker). Sauté the onions first for 2-3 minutes, then add the potatoes and cook 5-10 minutes until they start softening and browning at the edges.
Open the can, drain any excess liquid, and break the corned beef into chunks directly into the skillet. Spread everything into an even layer and press down firmly with your spatula. Here’s where patience pays off: don’t touch it for 5-7 minutes (The Takeout). That undisturbed time lets a real crust form underneath.
Flip sections—rather than stir—pressing down again. Repeat 2-3 times total, adding butter or a splash of oil between flips if the pan looks dry. By the third cycle, you should have distinct golden-brown patches throughout (The Country Cook). Season, garnish with parsley, and serve hot.
For home cooks chasing that restaurant-quality crust, the message is simple: less movement equals more browning. Three flips with firm pressing delivers golden patches in ways a wooden spoon stirred mess never will.
What’s the best way to make canned corned beef hash?
Beyond the basic method, a few moves separate forgettable hash from the kind people request by name. Moisture control and pan choice matter more than any special ingredient.
Prep tips for crispiness
Drain the canned corned beef before it hits the pan. Excess liquid and fat are the enemy of browning—it steams instead of sears (The Takeout). Pat the beef dry with a paper towel if it seems particularly wet.
Your potato surface moisture also counts. After dicing, let them sit uncovered on a towel for a few minutes before cooking. Heavy-bottomed pans—whether cast iron, carbon steel, or stainless—retain heat better and promote even crisping rather than hot spots (The Takeout).
Seasoning secrets
Plain salt and pepper works fine, but a few additions take this to another level. Worcestershire sauce builds savory depth without overwhelming the corned beef flavor (Reluctant Entertainer). A splash of apple cider vinegar or white wine vinegar added gradually while cooking tenderizes the potatoes and deglazes the fond from the bottom of the pan (The Happier Homemaker).
Other options to have nearby: soy sauce or tamari for umami, hot sauce for heat, ketchup for a touch of sweetness, or a pinch of paprika for color. None are required, but each adds character when used intentionally.
The difference between acceptable and excellent isn’t a secret recipe—it’s the willingness to let the hash sit undisturbed long enough to build a crust worth eating.
How to make corned beef hash with canned corned beef and mashed potatoes?
The mash variation appeals to two crowds: those with leftovers to repurpose and anyone who prefers a creamier, softer texture over crispy chunks. It’s a British-inspired approach that changes the whole eating experience.
Adapting with mash
Start with your favorite mashed potato recipe— Yukon gold potatoes give the best texture, but russets work too (The Happier Homemaker). Let the mash cool slightly so it holds together when pressed.
Crumble the canned corned beef and fold it directly into the mash, breaking up any large clumps. Shape into patties or press into a skillet layer, then cook similarly to the standard method—medium-high heat, press down, flip when golden.
Mixing ratios
- 3 cups mashed potatoes to 1 can (12 oz) corned beef for a balanced patty
- More mash: firmer cake, easier to flip, less intense beef flavor per bite
- More beef: richer and saltier, harder to form stable patties
The result looks more like a savory potato cake with beef running through it than traditional chunky hash. Serve with a fried egg on top for a complete meal, or alongside toast to soak up any buttery drippings.
Creamier texture means you sacrifice the crispy exterior that defines classic hash. For those who love that contrast, the stovetop method stays superior—but the mash version wins on comfort-food appeal.
What’s the secret to good corned beef hash?
Talk to anyone who’s mastered this dish and the answer circles back to the same principle: patience with heat. The Maillard reaction—that complex browning that creates flavor compounds—needs time and uninterrupted contact with a hot surface.
Crisping techniques
Press down firmly and consistently. Don’t just nudge the hash—weight it down with your spatula and hold pressure for 15-20 seconds per section. This maximizes surface contact with the hot pan (The Country Cook).
Cover the skillet for the first few minutes if working with raw potatoes—this traps steam and finishes cooking the interior without over-browning the outside. Remove the cover once the base has formed to finish crisping (The Happier Homemaker).
For extra-crispy results, some cooks sear individual corned beef pieces in the hot pan before mixing them in. This adds another layer of texture but takes an extra 5 minutes (YouTube demonstration).
Flavor boosters
Build layers rather than dumping everything in at once. Start with aromatics (onions, garlic), then the potatoes, then the beef, then finish with fresh herbs or a squeeze of lemon right before serving.
Acid brightens everything at the end. A few drops of Worcestershire, a splash of vinegar, or even a small spoonful of mustard stirred in off-heat wakes up the richness of the corned beef (Reluctant Entertainer).
No amount of technique salvages a cold, crowded pan. If your ingredients steam rather than sizzle when they hit the oil, you’re overcrowding. Cook in batches or use a larger skillet—the extra few minutes of prep is worth it.
What are common mistakes in making hash?
Even experienced cooks stumble on a few predictable pitfalls. Knowing them in advance saves you from discovering them mid-recipe when it’s too late to recover.
Overmixing pitfalls
Constant stirring is the most common mistake. It breaks apart the corned beef into mush and prevents any surface from sitting long enough to brown. Once the hash is in the pan, resist the urge to move it—flip, don’t stir (The Takeout).
Mixing the beef and potatoes together too early also hurts. Keep them separate until the potatoes are nearly done, then combine them in one press-and-flip session rather than stirring throughout cooking.
Undercooking issues
Raw potato chunks in finished hash are a texture disaster. If skipping the parboil step, dice potatoes smaller (under 1/2 inch) and increase your total cook time by 10-15 minutes. Test one piece before calling it done—the interior should be completely tender, not firm.
Insufficient oil also leads to sticking and uneven browning. Use enough to lightly coat the pan surface—you want visible shimmer, not a soaking puddle. If the hash starts sticking mid-cook, add a tablespoon of butter or oil and wait 30 seconds before trying to flip.
What works well
- Pressing firmly and waiting 5-7 minutes before flipping
- Using a cast iron or heavy-bottomed skillet
- Draining canned beef and patting dry
- Parboiling potatoes 5-10 minutes before skillet work
- Adding butter between flip cycles for golden crust
- Seasoning at the end, not drowning mid-cook
What goes wrong
- Constant stirring breaks texture and prevents browning
- Overcrowding causes steaming instead of searing
- Insufficient oil leads to sticking and uneven patches
- Skipping parboil without adjusting dice size leaves raw centers
- Adding seasoning too early masks the beef’s natural flavor
The implication: invest in a quality skillet and commit to hands-off cooking, or accept mediocrity as your reward.
“The key is moisture control and patience… pressing the mixture down to let it build a crust. The biggest mistake people make is stirring too soon. If you give it five to seven minutes undisturbed, you’ll get that crisp edge everyone loves.”
— Corey Small, culinary expert
“This is really what makes it a hash is that crust that forms on the corned beef and potatoes.”
— The Country Cook, recipe author
“Skillet is best, air fryer is a strong second, and the oven is decent but milder.”
— Corey Small, culinary expert
“Truly, the less you stir, the better. Constant movement stops the browning reaction you actually want.”
— Corey Small, culinary expert
Related reading: chicken breast calories · Le Cordon Bleu London
While our skillet tips ensure perfect crispiness, the crispy corned beef hash recipe transforms a simple tin into a golden British storecupboard classic with pantry staples.
Frequently asked questions
How long does corned beef hash last in the fridge?
Stored in an airtight container, corned beef hash keeps for 3-4 days in the refrigerator. Reheat in a skillet over medium heat until warmed through and crispy again, or microwave for 1-2 minutes if texture doesn’t matter as much.
Can I freeze canned corned beef hash?
Yes, though the potatoes may become slightly grainy upon thawing. Freeze in portion-sized containers for up to 2 months. Reheat from frozen in a covered skillet over medium-low heat, adding a splash of water to restore moisture.
What can I serve with corned beef hash?
Fried eggs on top make it a complete breakfast. Toast, biscuits, or crusty bread alongside soaks up excess butter. For dinner, pair with steamed greens, coleslaw, or a simple side salad to balance the richness.
Is corned beef hash gluten-free?
Plain corned beef hash using just beef, potatoes, onions, and oil is naturally gluten-free. Watch out for Worcestershire sauce (some brands contain soy or anchovies) and any flour dredging if someone coats patties before cooking.
How to reheat corned beef hash?
Stovetop gives the best results: heat a skillet over medium-high, add a tablespoon of butter or oil, spread the hash in an even layer, press down, and cook undisturbed for 4-5 minutes per side. For a crispy exterior without watching the pan, reheat in a 375°F oven for 15-20 minutes.
What if I don’t have fresh potatoes?
Canned or frozen hash browns work in a pinch, though the texture differs. Frozen shredded potatoes need less parboiling—just thaw, squeeze out excess moisture, and proceed with the standard cooking method. Canned diced potatoes work too, though they lack fresh potato flavor.
Can I add vegetables to corned beef hash?
Bell peppers, mushrooms, celery, or corn all work well. Add denser vegetables (peppers, mushrooms) with the onion stage; lighter vegetables (corn, peas) in the last 3-4 minutes to prevent overcooking. Avoid watery vegetables like tomatoes unless you want a more stew-like consistency.
For home cooks looking for a weeknight shortcut that doesn’t taste like one, canned corned beef hash handled this way delivers. The stovetop method takes 35 minutes start to finish, costs less than ordering takeout, and yields a crust that justifies the effort you didn’t have to put in. Home cooks who follow this approach consistently report results worth repeating.
More related posts
 Best WiFi Extender UK 2026: PCMag, Telegraph Top Picks
 Sophia Bush: Coming Out, Relationships, Voice, Career
 The White Lotus Season 3: Controversy, Episodes & Cast
 Royal Mail Jobs Near Me: Pay, Qualifications & How to Apply
 John Palmer: Goldfinger’s Life, Crimes, and Unsolved Murder
 Paul McCartney Health, Wealth, Family & Religion: Key Facts
 Lemon Drizzle Cake Recipe: Easy Moist Mary Berry Style